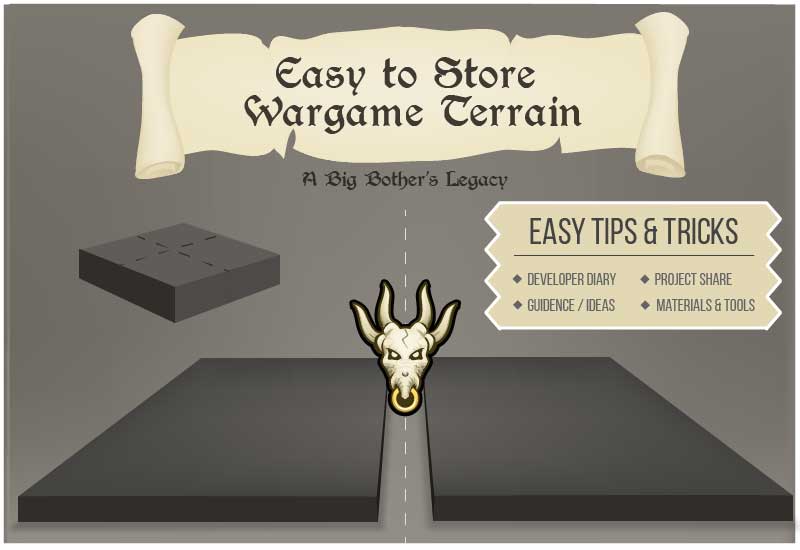
How to make easy-to-store wargame terrain… the good, the bad, and the fun.
But first, a tribute.
Much of what is written in this post celebrates and reflects upon the memory of my older brother and myself creating a piece of wargame terrain in a corner of my Dad’s factory. The setting of the wargame terrain discussed and illustrated in this post was ‘Space Cruhammer’, but more on that later…
How to make easy-to-store wargame terrain – what you should know before reading!
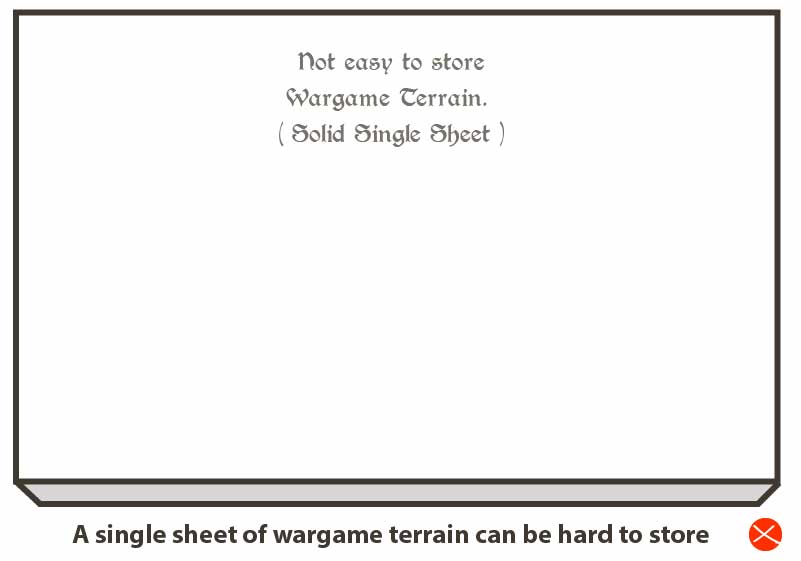
The original terrain that my brother and I created was neither modular nor easy to store! For the sake of writing something useful, I have taken liberties to help the reader navigate the trials and tribulations of making easy-to-store wargame terrain. ( and hopefully, not as easy to break! )

How to make a easy to store modular wargaming terrain – Quick answer
To make easy to store modular wargame terrain, it needs to be lightweight, robust, and appropriate for your living situation. A large environment will need to be easy to deconstruct and store without ruining! Many terrain makers opt for modular, scatter or easy-to-fold or roll-away terrain to make their terrain easy to store.
Consider using materials such as light-weight board, XPS foam, or polystyrene, which can be cut into segments and packed away.
Various materials come with advantages and disadvantages when creating you easy to store wargame terrain. Expanded polystyrene, for example, can be good and cheap, but it can break and dent easily. MDF is rigid but less forgiving when bent.
To decorate your modular wargame terrain, you will also need paints, glue, and a variety of other arts and crafts materials to create the environment you want to create. Easy to store is important, as is making it exciting to play on!
These tips and suggestions are based on experience. Both old and new! I would regard myself as a keen amateur, as was my brother. If we could do it, so can you!
‘In all likelihood, hardly at all!‘
– about 3 paragraphs down…

Opinion 1 | What I would recommend using when creating easy to store terrain
Something robust with a hard bottom! If you can avoid stacking your terrain when stored, all the better. Better still if you don’t have to shove your terrain behind a piece of furniture or cram it behind a bureau in the kitchen… shared from experience!

Opinion 2 | What I wouldn’t recommend using when creating easy to store terrain
This particular wargaming terrain was put together using a large sheet of expanded polystyrene, UniBond, acrylic paints, and acetone to create trenches, gouges, and burns in the grim-bright landscape. It was shoved behind the sofa. Boisterous teenagers and the passage of time took their toll on the original terrain; needless to say, it did not survive.
‘Where’ your terrain is stored is just as important as the materials you use to create it.
It is of little benefit to create something pretty if it will be shoved into places, stood on, bounced on, scratched by the dog etc! A safe place for your modular terrain should be at the forefront of your design.
A lesson to share there…
Step 1: The Cartography & Plan
What will go where, how big or small each segment will be, and the general scale are important steps to consider in the creation of your easy-to-store terrain. Here is a list of criteria that may help you in your design and planning of your modular terrain.
- The size of each segment and whether it can fit where you intend to store it.
- How many pieces or segments may be necessary
- The size of the space in which you intend to store your modular terrain
- How it will store – stacked, on its side or with sponge or cushioning of some kind
- What game and scale are you intending on making your modular terrain for
- The materials used in constructing your modular terrain
- Whether the game terrain is suitable for multiple scenarios
- How wear and tear impact the terrain
One of your best assets in this very early stage development is:-
- A tape measure
- Something to draw and create your map
- An idea of the setting
- How and where your modular terrain will be stored
How the original wargame terrain was planned and mapped
In all likelihood, hardly at all!
In honouring my brother’s memory, I wanted to try and stay as true to the original build as possible – much of this is going on the memory of an 11 / 12 year old. Unless my very distant memory betrays me, the old map was planned on a simple piece of paper. Nothing fancy.
What inspired the terrain – ‘Space Cruhammer’
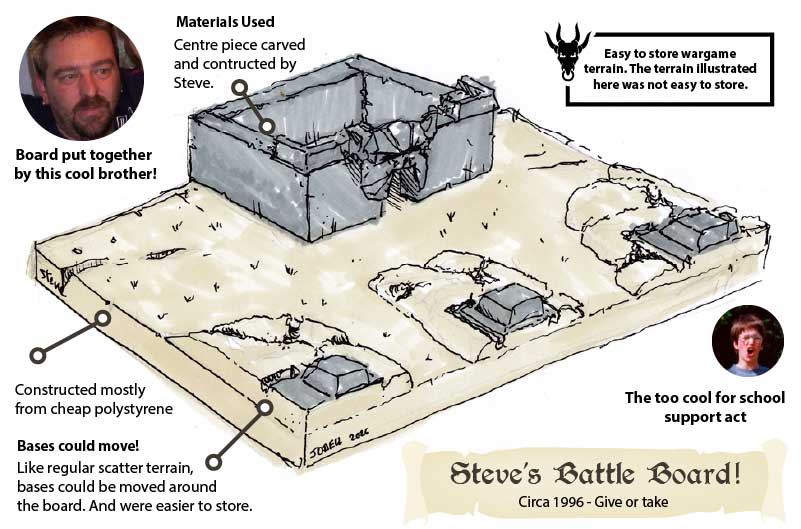
Much of the war game terrain illustrated in this post was constructed by my late brother while ‘working’ at my Dad’s factory.
The factory had an abundance of tools and materials to play with, from polystyrene sheets to Polyfilla and even epoxy resins. These resins were used predominantly in trade and construction, but lent themselves well to model-making.
This factory was the perfect springboard to make something large-scale. Abundance of materials, an open space, model wood! An annoyed Dad, the big boss…
My big brother was the driving force behind this project. And much of his inspiration came from looking at old White Dwarf magazines and playing Space Crusade. ( Hence – Space Cruhammer )
The board was an approximate 4 x 6 foot sheet of one-and-a-half-thick polystyrene.
Across the long-edge of the board, sat 3 small Space Marine bases. Imperial Fists, Blood Angels, Ultramarines. The same teams from the original space Space Crusade and its components.
Across from our Space Marines bases loomed the Chaos Fortress. Home to or that was Xeno evil and Chaos!
Step 2 ) Materials needed to create your easy-to-store terrain :
Keeping true to the original build. My brother used what materials he could find around and about my Dad’s workshop. Feel free to substitute if and where applicable.
- Polystyrene sheet – Approximately 4 x 6
- Balsa wood ( added bonus )
- Polyfilla – or a substance to create texture
- Model Flock
- PVA type glue
- Craft type knife or saw
- Model paints
Building the Terrain | Materials Explained
Here is a simple list of materials used in this project – from memory. If you are interested in materials in model making and converting miniatures, you may find this post of interest – how to make a conversion.
Polystyrene
Polystyrene or EPS board is cheap, lightweight, and easy to cut and carve! This material is abundant in many DIY shops in the UK, and presumably – the world! My big brother and I used a large sheet of polystyrene to act as the ‘ground’ for the terrain.
Be mindful that polystyrene can be messy if cut with a saw!
Balsawood
Love this stuff. Common in many model shops and in art and craft stores. Balsa wood is a superb material for making model wargame terrain.
Balsa wood is soft and easy to cut. It can be used in traditional and futuristic settings as boards, timber, planks, and as part of a plethora of world-manufactured objects! In this scenario, my brother used Balsa wood to create a barn and as part of the integral structure of an Ork mud hut.
Plastic shavings from UPVC windows as budget flock ( use something better… )
Staying true to what was used, my brother scraped together a heap of plastic shavings from the router machine used in constructing UPVC windows. UPVC is not a common material, and I would personally encourage model makers to find an alternative material – such as model flock, or something else of a similar nature.
UniBond – Substitute with PVA
Uni bond was used everywhere on this project. From adhesive to glue pieces of polystyrene together, to creating a mixture of UPVC shavings for the grass! I would personally substitute Uni-Bond for low-cost PVA glue.
Step 3 : Sample Equipment List | For creating easy-to-store war game terrain
When building your easy to store wargame terrain, you will need some basic equipment to get started.
With the original terrain that I built with my brother – much of what was used was found about my Dad’s window-making factory. I would consider swapping out certain tools that are more modern and more appropriate for model making.
Here are some basic modelling tools and gear for constructing the modular terrain :
- Craft knife / Stanley Knife
- Spatulas – things for spreading
- Pots for mixing
- Tape measure
- Pencil
- Coping Saw
- Cheap brushes
- Clippers
- Toothpicks
The tools above are an absolute minimum for cutting and shaping your terrain. There are also many better solutions to be used these days!
Step 4 : Theme & Environment – Build with your imagination
This could easily come at the start of the project as well as here, but before you cut or stick anything, consider the theme!
I would encourage you to come up with a name for your terrain. This can help with world-building and further establish the environment you intend to make.
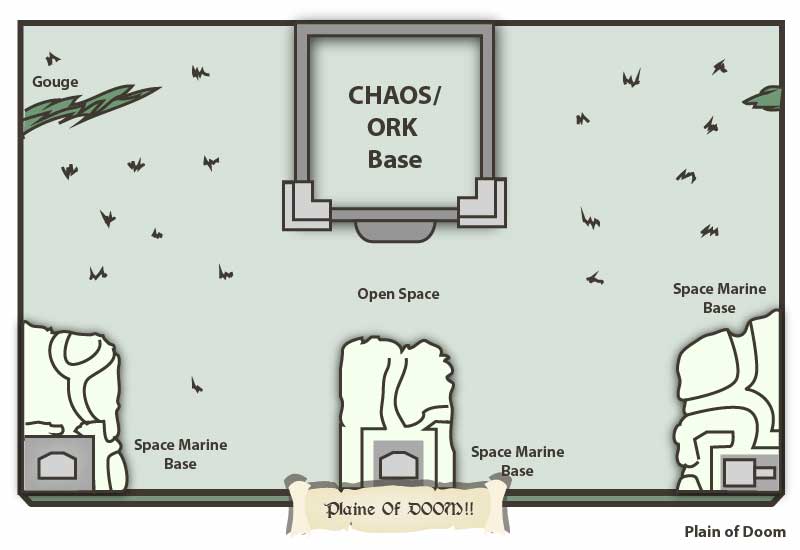
I will stay true to what my brother called part of the environment – The Plain of Doom!
The environment was a mixture or grassland, craters, and hills. 3 smaller imperial outposts sat at the bottom edge of the battlefield. Opposite the Imperial outposts, loomed a dark chaos fortress with a tropey bestial gargoyle as its door and mouth – yawning perils onto the battlefield.
Consider what you want your environment to be and where you want it to be. The outposts and buildings could be regarded as large pieces of scatter terrain. In the original construct, these components outlived the ground ( the polystyrene ground )
Naming your environment. Here are some ideas to get the juices flowing!
- The plains of Doom …
- The scarred lands of …
- The red hills of …
- The wandering plains of …
- The battlegrounds of the small armies…
Next, making and cutting…
Step 6: Making the Ground
How to make easy-to-store wargame terrain – will your terrain be 2 parts, 4 parts, 6 parts or even 3?
Remember to make sure the segments of your modular terrain will fit where you intend to store them! Assuming you have considered the theme, the map, and the dimensions, and you have some equipment and materials.
My brother and I kept the ground of the terrain fairly neutral so that the buildings could be removed from play and stored safely.
The ground was ‘based’ using UPVC shavings mixed with or glue and green paint. An additional layer of paint was likely applied afterwards.
I would, however, recommend ways of building more authentic textures or model flock. You can also glue and paint sand, but be prepared that sand can come unstuck unless sealed!
Step 6.1 ) Bases of the Astartes
I have to give it to my brother; this was a very cool part of his terrain idea. With much of our inspiration coming from Space Crusade, he set about designing 3 smaller bases for the following Space Marine factions from the Warhammer 40,000 universe:
- Imperial Fists
- Blood Angels
- Ultramarines
Each base had its own property and character. But they were all uniform in their setup. A small base perched on the edge of the battlefield acted as a springboard for the Space Marines.
These bases were created as if they were scatter terrain. They were very easy to store and personalise. The base or the food was a knobbly hillock created from a piece of roughly cut polystyrene. On top of these very small hillocks with finger-dug trenches sat a base!
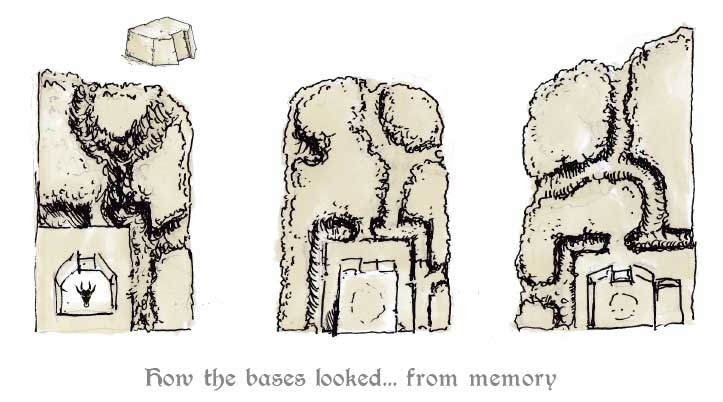
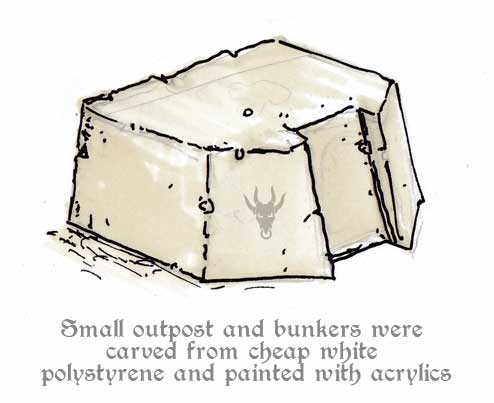
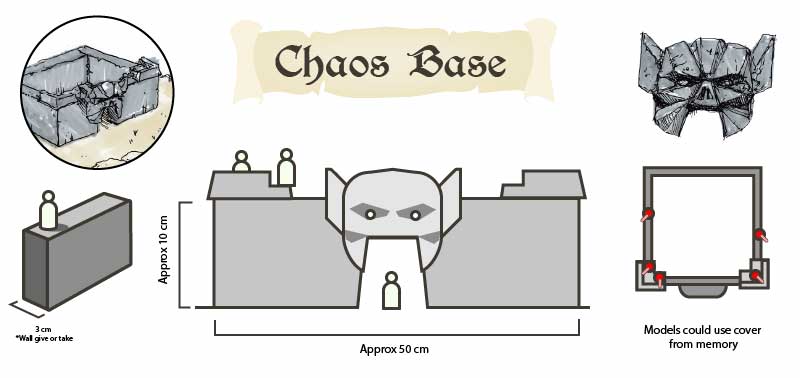
Step 6.2:The Chaos Base
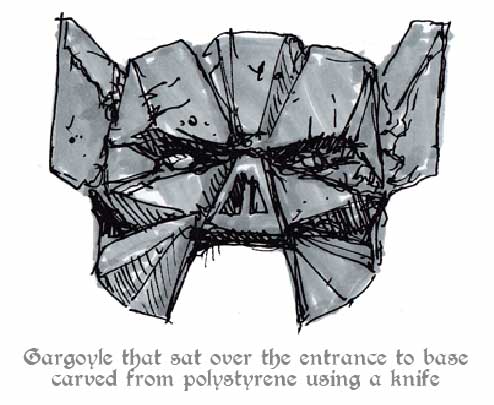
From across the battlefield loomed an ominous black structure. A large bestial face was built into the forefront of the base, with its gaping maw acting as the entrance to and from its hollow interior.
Again, looking through my brother’s and my lens, this base was more or less created as if it was made for Crusade Hammer – a game that never existed apart from in our minds.
The square chaos base itself was constructed from 4 pieces of polystyrene with a carved polystyrene Ork face over the main entrance. The base was more reminiscent of a square castle, with the centre acting as an open courtyard. This was more for playable practicality than aesthetic.
The base was easy to store and put away. It was painted with black acrylic paint.
Summary | How to make easy to store wargame terrain
By following some of the tips mentioned in this article, hopefully you will have some better ideas on how to go about making your easy-to-store wargame terrain. If nothing else, I hope this terrain inspired you or made you feel something in your pursuit of wargame terrain building!
Here is a takeaway for what to remember when creating your easy-to-store war game terrain :
- Do make sure you can store your terrain properly ( trust me on this )
- Check the materials being used are robust enough to withstand being taken in and out for storage
- Be prepared for some wear and tear on your model terrain
- Be prepared to touch up and repaint certain parts of your terrain, especially the corners and edges
- Take into account the size and scale of your terrain
- Use your imagination
Dedication and tribute: Steve Odell
I would like to dedicate this article to my late brother, who sadly passed away in October 2025, unexpectedly. This is a tribute celebrating his unsung creativity and model-making skills. Above all else, he was a big brother who got to make something cool with.
Cheers, big bro, miss you.
2 brothers made this. 1 brother who should have been probably making UPVC windows or sweeping Dad’s factory floor… cheers big bro. And the other, who was barely in secondary school and wore massive jam jars ( glasses ).
Venture on, brother.
Other pages and articles that may be of interest
- Ideas for poxwalker conversions
- How do you make miniature conversions
- What came in a box of Space Crusade
- 3rd Edition Warhammer 40,000 box contents
- How to make a fan game from scratch
Credits and 3rd Party Links